Managing social media for a business can become repetitive very quickly. You create a post, open LinkedIn, publish it, then switch to Facebook, Instagram, YouTube or another platform and repeat the same process.
A social media scheduling tool can make this workflow much easier.
One tool we have used and found useful is Publer, a social media management and scheduling platform that allows you to connect social accounts, create content, preview posts and schedule them from one dashboard.
This article explains how to use Publer with its Free plan, specifically for businesses that want to connect up to three social media accounts and schedule their content from one place.
We are not affiliated with Publer, we are not an affiliate partner, and this article is not sponsored by Publer. We are simply sharing a tool that we have used and believe businesses and marketers may find useful.
Important: Publer’s features, limits, supported networks and pricing can change. At the time of writing, Publer’s Free plan supports up to 3 social accounts, with up to 10 scheduled posts at a time per account. Twitter/X is excluded from the Free plan. Always check Publer’s current documentation before relying on any specific feature.
What Is Publer?
Publer is a social media scheduling and management tool that brings multiple social media accounts into one dashboard.
Instead of logging into every platform separately, you can connect supported social accounts to Publer and use its publishing interface to create and schedule content.
Publer communicates with social networks through their APIs. Because every social network has different API rules, the available features and publishing options can differ from one platform to another.
For a small business, freelancer, content creator or marketing professional, the basic idea is simple:
Create once → select your social accounts → schedule → let the platforms publish the content.
What Can You Do With the Free Publer Plan?
For this guide, we are focusing only on the Free plan.
According to Publer’s current documentation, the Free plan allows you to connect up to three social accounts. Each connected account counts separately. For example, two Facebook Pages and one LinkedIn account would use all three available slots.
The Free plan also currently allows up to 10 scheduled posts at one time per social account, giving a maximum of 30 pending scheduled posts across three accounts. When scheduled posts are published or deleted, you can schedule more.
Other Free-plan capabilities include:
- Scheduling supported post types
- Customizing content for different social networks
- Previewing posts
- Viewing scheduled content in a calendar
- Creating a posting schedule
- Using the built-in photo editor
- Uploading media from supported external sources
- Organizing connected accounts
- Using certain link-shortening and UTM options
Some features are limited or unavailable on the Free plan, so don’t assume that everything shown in the Publer interface is included permanently for free.
Step 1: Create Your Publer Account
Start by creating a Publer account.
The registration process requires basic account information, and Publer also provides options to sign up using supported external accounts.
Once your account is created, you will reach the Publer dashboard.
The dashboard gives you access to areas such as:
- Home
- Ideas
- Posts
- Media
- Social Accounts
- Analytics
- Other workspace features
For this tutorial, the two sections you will use most are Social Accounts and Create.
Step 2: Connect Your Social Media Accounts
From the left-hand menu, open Social Accounts.
You will see the different social networks that Publer supports.
Select Connect next to the platform you want to add.
For example, you might decide to connect:
LinkedIn + Facebook + Instagram
Because we are demonstrating the Free plan, stop after connecting three social accounts.
Remember that a social account means an individual connected account, page or profile depending on the network. Three slots do not necessarily mean three different social networks. For example, multiple Facebook Pages can consume multiple account slots.
Example
Suppose a small business has:
- LinkedIn Company Page
- Facebook Business Page
- Instagram Business Account
Those three accounts can fit within the current Free-plan allowance.
Step 3: Give Publer the Required Permissions
When connecting a social account, Publer may redirect you to that platform.
You will need to authenticate and authorize the connection.
This is important because Publer needs permission to communicate with the social network and publish the content you schedule.
For Instagram, for example, Publer currently supports connecting Creator and Business accounts through supported connection methods.
Do not blindly approve permissions just because you want to schedule posts.
Read the permissions displayed during the connection process and understand what access you are granting.
This is especially important when connecting a company’s social media accounts.
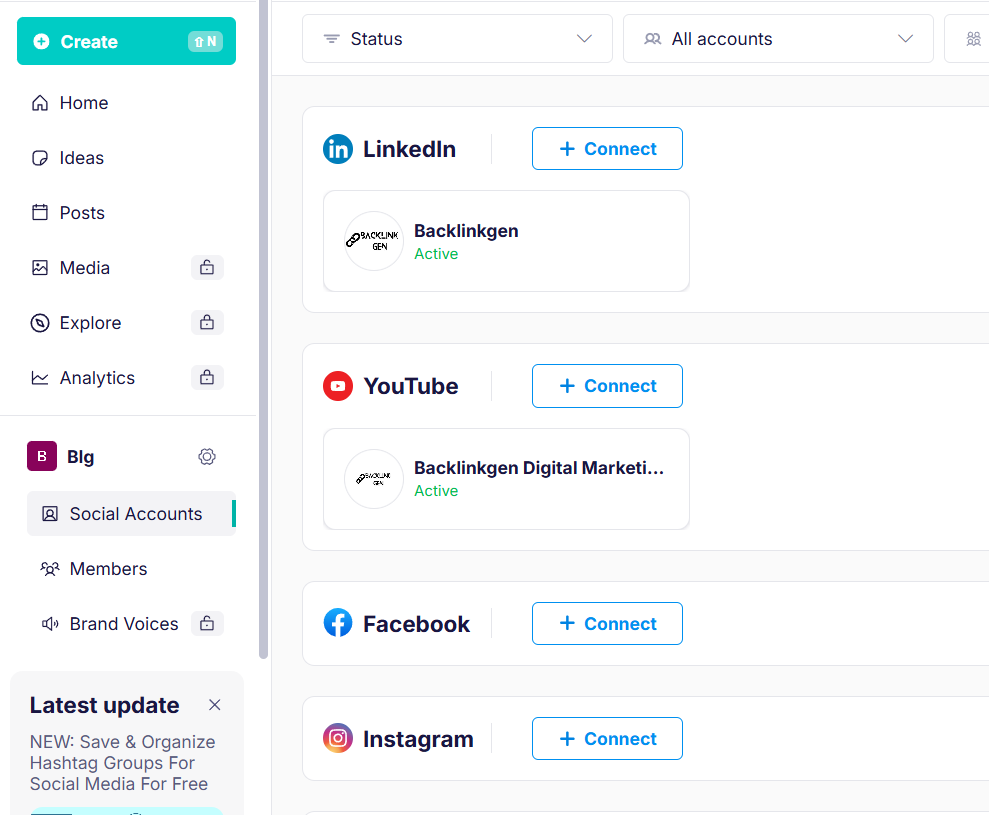
Step 4: Check Your Connected Accounts
After authorization, return to Social Accounts.
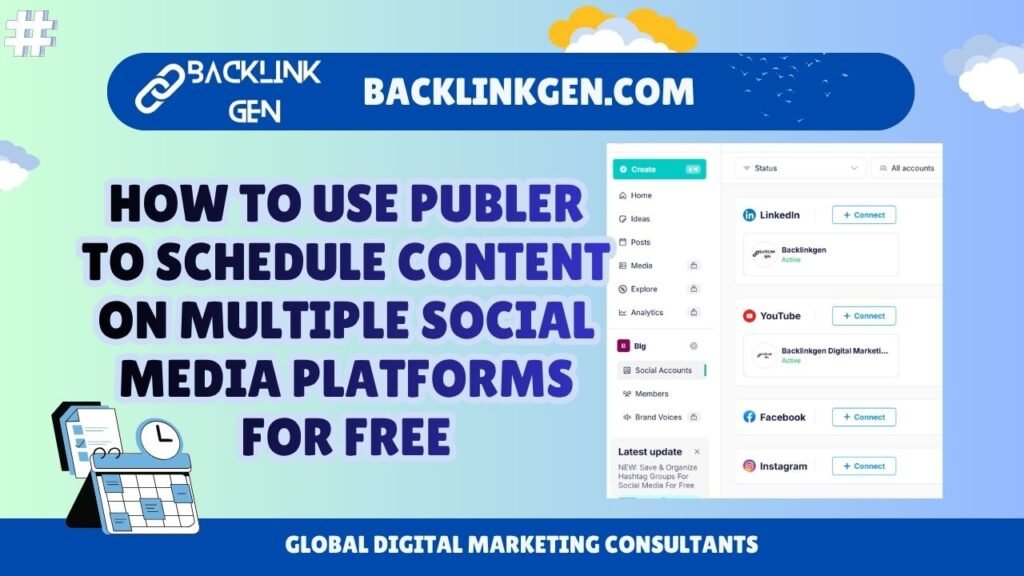
You should see the connected accounts listed under their respective networks.
The screenshot we have included in this article shows an example where LinkedIn and YouTube accounts have already been connected and are displaying as Active.
This is useful because you can quickly verify whether an account is properly connected before attempting to schedule content.
If an account shows an authentication problem or becomes disconnected, you may need to reconnect or reauthorize it.
Step 5: Click Create
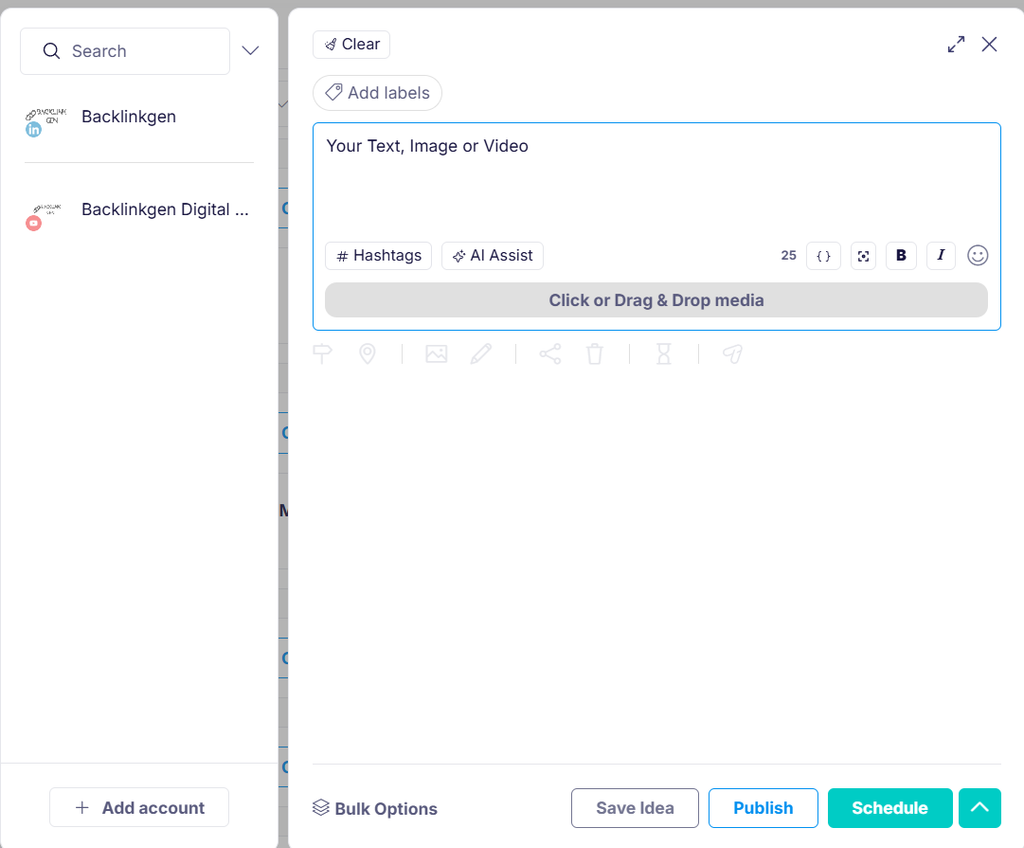
Now comes the useful part.
Click the Create button from the left-hand menu.
This opens Publer’s content composer.
Here you can start preparing your social media post.
Depending on the social networks selected, you can add things such as:
- Text
- Images
- Videos
- Links
- Hashtags
- Other supported post elements
The exact options available can vary depending on the selected social network.
Step 6: Select Your Three Social Accounts
On the content creation screen, select the social accounts where you want the content to appear.
For example:
LinkedIn ✓
Facebook ✓
Instagram ✓
Now you can prepare one campaign for all three accounts.
This is where a scheduling tool becomes useful.
Instead of copying and pasting the same content into three different platforms, you can manage the publishing process from one interface.
Publer also allows you to customize posts for individual social networks, which is important because identical content is not always the best approach for every platform.
Step 7: Don’t Always Use Exactly the Same Caption
This is one of the most important points.
Scheduling the same content everywhere does not mean you should write exactly the same post everywhere.
For example, a LinkedIn post might be more professional and detailed.
An Instagram caption might be shorter and more visual.
A Facebook post might encourage discussion.
You can use Publer’s customization options to adapt your content for different networks rather than treating all platforms exactly the same.
For example:
We recently published our guide to improving website performance. Here are five practical things businesses should check…
Is your website loading slowly? Here are 5 things you should check. 👇
Is your website slower than it should be? We have put together a quick checklist to help you identify common performance problems.
Same campaign.
Different presentation.
That is a much better social media strategy.
Step 8: Choose Schedule
Once your content is ready, click the Schedule option.
You can specify the date and time when the post should be published.
Publer also supports predefined posting schedules and AutoSchedule functionality. The basic workflow is to create your posting schedule first and then use AutoSchedule when creating content.
For a beginner, however, I recommend starting with manual scheduling.
For example:
Monday — 10:00 AM
Wednesday — 2:00 PM
Friday — 5:00 PM
You can create your own schedule according to your audience and content strategy.
Step 9: Use the Calendar to Manage Everything
Once posts are scheduled, Publer provides a calendar view where you can see upcoming content.
This is extremely useful for businesses because you can quickly answer questions such as:
- What are we posting tomorrow?
- Did we schedule this week’s content?
- Are we posting too frequently?
- Which social account is receiving the content?
- Do we have gaps in our content calendar?
Instead of maintaining a separate spreadsheet just to remember publishing dates, your scheduling tool becomes the central content calendar.
Step 10: Review Before Publishing
Don’t simply schedule everything and forget about it.
Always preview your posts before they go live.
Look for:
- Incorrect links
- Spelling mistakes
- Wrong images
- Missing hashtags
- Incorrect formatting
- Broken URLs
- Wrong dates
- Incorrect brand information
- Platform-specific formatting issues
Publer provides previews for supported social networks, which can help you review how content will appear before publishing.
A two-minute review can prevent an embarrassing social media mistake.
Why Use a Social Media Scheduling Tool?
The biggest advantage isn’t simply automation.
It is workflow efficiency.
Imagine a business publishing three posts per week across three platforms.
Without a scheduling tool, the team may repeatedly:
- Open LinkedIn
- Create the post
- Publish it
- Open Facebook
- Create the post
- Publish it
- Open Instagram
- Create the post
- Publish it
That is nine individual publishing actions for one week’s basic content.
With a scheduling platform, you can prepare the campaign in one workflow and schedule the content in advance.
The main benefits include:
1. Saves time
You don’t have to manually publish every post at the exact moment it needs to go live.
2. Creates consistency
A predefined publishing schedule makes it easier to maintain a regular social media presence.
3. Reduces repetitive work
You can manage multiple connected accounts from one dashboard.
4. Improves planning
The calendar gives you a clearer picture of your upcoming content.
5. Helps small teams
A small business without a dedicated social media team can still organize content professionally.
6. Reduces last-minute publishing
Instead of remembering to post every morning, you can prepare content in advance.
7. Makes content management easier
Your scheduled posts, accounts and publishing workflow are available in one place.
A Simple Free Publer Workflow for a Small Business
If you are managing social media for a small business, here’s a simple workflow I would recommend.
Monday
Create 2–3 pieces of content.
Tuesday
Prepare captions and visuals.
Wednesday
Schedule the content for your three connected social accounts.
Thursday
Review upcoming posts.
Friday
Check engagement and decide what type of content should be created next.
The goal isn’t to automate your entire marketing strategy.
The goal is to remove repetitive publishing work so you can spend more time creating better content and engaging with your audience.
Important Limitations of the Free Plan
Don’t confuse the Free plan with unlimited social media management.
At the time of writing, Publer’s Free plan has a 3-social-account limit, excludes Twitter/X, and allows up to 10 pending scheduled posts per account. It also has a 25-draft limit and only 24 hours of published-post history within Publer.
These limits can change.
Therefore, if you are planning a large social media operation, check the current pricing and feature documentation before building your workflow around the Free plan.
Important Disclaimer Before You Connect Your Business Accounts
We are not affiliated with Publer, do not represent Publer, and are not receiving compensation or affiliate commissions for recommending this tool.
We are sharing Publer because it is one of the social media scheduling tools we have used and believe may be useful for businesses and marketers.
However, you should make your own decision before connecting any business or personal social media account to a third-party service.
Before using Publer, carefully read:
- Publer’s current Terms of Service
- Publer’s Privacy Policy
- The privacy policy of each social network you connect
- The terms applicable to your particular social media account
- The permissions requested during account connection
- The current Free-plan limitations
Publer’s Terms of Service state that connected third-party platforms are subject to the applicable third-party terms. Publer also states that its service can change and that feature availability and limits may be modified.
Publer’s Privacy Policy also explains that connecting social accounts may involve information being received from those platforms and that information may be subject to the relevant social network’s privacy policies.
Most importantly, never assume that a third-party scheduling tool overrides the rules of Facebook, Instagram, LinkedIn, YouTube or any other platform.
You remain responsible for the content you publish and for complying with the applicable platform rules.
Also, don’t connect an account if you don’t have the necessary authority to manage or authorize it.
For the latest official information, read Publer’s Terms of Service and Publer’s Privacy Policy before using the service.
Is Publer Free Worth Trying?
For a small business that only needs to manage three social accounts, the Free plan can be a practical way to test the concept of centralized social media scheduling without immediately paying for a subscription.
The biggest benefit is simple: you prepare your content once and manage your publishing workflow from one dashboard.
However, don’t use automation as a replacement for social media strategy.
Good social media still requires:
- Original content
- Platform-specific messaging
- Audience engagement
- Regular monitoring
- Performance analysis
- Human interaction
A scheduler handles the repetitive publishing part.
Your strategy still determines whether that content actually works.
And because free-plan features and platform integrations can change, always verify the current limits and terms directly with Publer before relying on it for your business workflow.
Useful ways to apply this workflow
- Create a weekly posting schedule
- Compare Publer with Buffer and Later
Resources: Publer
About Author:
Amit Tyagi is a Senior Digital Marketing Specialist and Web Development Strategist with over 15 years of experience in SEO, website development, and data-driven digital growth. He has successfully built and optimized more than 50 websites across various industries, helping businesses improve online visibility, generate leads, and increase revenue through strategic digital marketing.
His expertise spans search engine optimization (SEO), content strategy, conversion-focused web development, marketing automation, and analytics-driven decision making. Amit combines technical development skills with advanced digital marketing strategies to create high-performing digital ecosystems for brands.
Throughout his career, Amit has worked on eCommerce, B2B platforms, and enterprise-level digital projects, delivering scalable solutions that align technology with business goals. He is also known for sharing insights on modern SEO trends, AI-driven marketing, and future digital strategies.
Amit believes that the future of marketing lies at the intersection of technology, data, and strategic storytelling.